How to root Samsung SM-G930F/D SM-G935F/D on Android 7.0 Nougat
These are the instructions to root Samsung SM-G930F/D SM-G935F/D (running on Android 7.0 Nougat ) using Odin on Windows Computer.
Requirements: Your should have atleast 30-40 percent of battery to perform the rooting process.
When ROOT Samsung SM-G930F/D SM-G935F/D you can change your ROM.But normally You can delete some company.
applications and free your mobile memory and also you can increase your Phone memory.
Notes
- The above tutorial only works for Samsung SM-G930F/D SM-G935F/D ON Android 7.0 Nougat .
- No data loss process: Your Personal Data including contacts, pictures, videos, music won’t be affected using the above method. In short, no data loss process.
- Samsung Stock Firmware: If you are looking for the original firmware for your device then head over to Download Samsung Stock Firmware for all devices page.
- Samsung USB Driver: If you are looking for the original USB Driver for your device then head over to Download Samsung USB Driver for all devices page.
- Big thanks to Chainfire for their CF Auto Root file for, without this tool, this tutorial was not possible.
Desclaimer:
- This is working on Exynos (SM-G930F) S7 Flat and (SM-G935F) S7 Edge models! (Should also work on all the Exynos Models)
- This will erase your phone so be sure to backup anything you need
- Your warranty is VOID Knox flags 0x1 or 0x500
- I’m not responsible for damage to your mobile or loss of warranty!
Requirements for rooting Samsung SM-G930F/D SM-G935F/D on Android 7.0 Nougat with CF-Auto-Root
These are the instructions to root your Samsung SM-G930F/D SM-G935F/D (running on Android 7.0 Nougat) using Odin on Windows Computer.
In this tutorial, I will show you how to ROOT yours Samsung SM-G930F/D SM-G935F/D with Odin software and CF-Auto-Root file.You can’t use this operation if you want to “unlock” hidden features of your phone.
To root your Samsung SM-G930F/D SM-G935F/D you need a PC with internet connection, a micro USB data cable, Odin software and the CF-Auto-Root file.
Root Samsung SM-G930F/D SM-G935F/D on Android 7.0 Nougat using Odin.
- go to Settings/About phone and enable Developer Options by pressing 7 times on Build Number, then, enter into Developer Options and enable USB Debugging and OEM unlock.
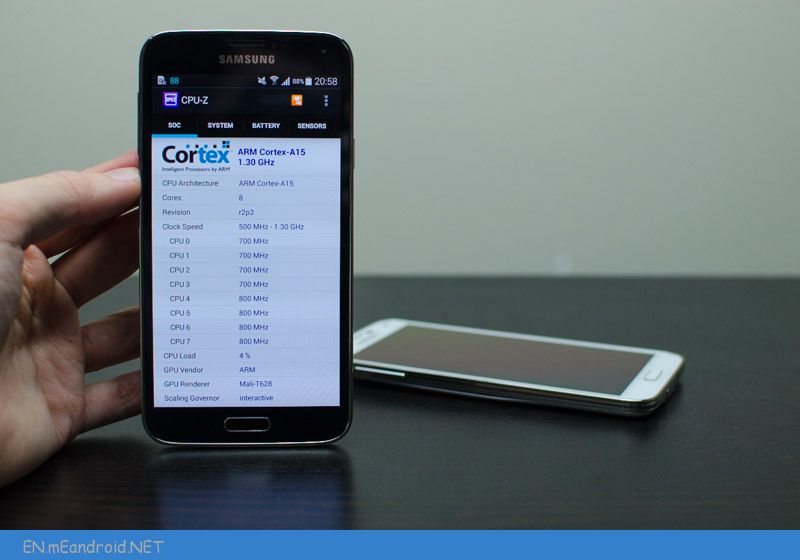
The Android version of this phone is and the Baseband version is.
If something goes wrong, or if you want to UNROOT your Samsung SM-G930F/D SM-G935F/D , you must restore the original firmware with Samsung Kies 3. - Download and Install Samsung USB Driver on your computer. If Samsung USB Driver already installed on your computer then Skip this Step.
![USB Logo]() Note before rooting Samsung SM-G930F/D SM-G935F/D on Android 7.0 Nougat
Note before rooting Samsung SM-G930F/D SM-G935F/D on Android 7.0 Nougat
 Note before rooting Samsung SM-G930F/D SM-G935F/D on Android 7.0 Nougat
- Battery Percentage Above 50.
- Backup Your Device HOW TO BACK UP ANDROID AND KEEP YOUR DATA SAFE 2017
- Install the Samsung USB Driver on your PC.
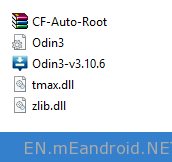
- Download Odin.
- Extract the Odin Files on your PC.
- Copy the Unikernel files in your PC.
- Enable OEM unlock & Debugging Mode in the Developer Options
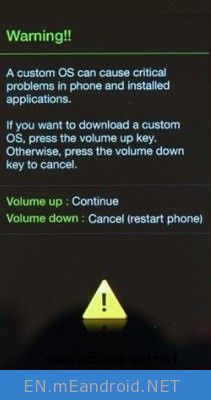
- After entering into Download Mode it will say Warning Press Volume Up button to continue.
- Connect Your Samsung SM-G930F/D SM-G935F/D With PC via USB Cable.
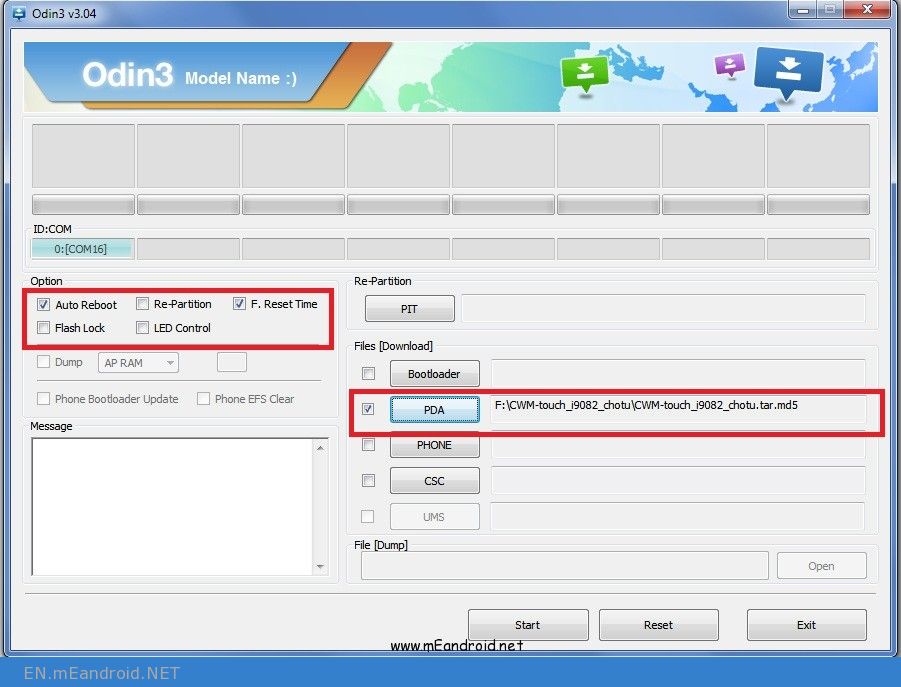
- Open Odin and place that TWRP tar file in the [AP] slot and disable Auto-Reboot and click on “Start” by connecting your phone.
![How to root Samsung SM-G930F/D SM-G935F/D on Android 7.0 Nougat]()
How to root Samsung SM-G930F/D SM-G935F/D on Android 7.0 Nougat
- When its done flashing, Hold [Volume Down] + [Home] + [Power] to get out of Download mode and immediately swap to [Volume Up] when the screen blanks.
If you don’t see TWRP boot splash, try again.![]()
- At this point, you will reach the screen asking you if you want to allow system modifications.
By swiping right, you will trigger dm-verity, and if you don’t follow the next step you will be unable to boot!
If you are going to root your device and follow the rest of these steps, then it is safe to swipe right and enable modifications.
If you want to use Systemless DevBase, then do not swipe. Keep it as read only. - Go to Wipe and click on format data. Type “yes” and it will format.
- Now go back to home and click on “Reboot” then click on “Recovery” Option.
- Now Transfer the above downloaded filed into your Phone or Memory Card or OTG Pendrive.
- Now again click on Install and flash the Super SU. Only the latest Super SU is working fine with no issues. Do not use the old versions.
- You can now click on reboot > system
- It will take about 5 Min and boot. Done. You’ve got the Nougat rooted.
After the fresh boot, you will setup everything. Once you are in, you can observe a notification.
This is a security notification – unauthorised actions have been detected. Restart your device to undo any unauthorised changes
Disable the notification permissions in settings and restart your device by using power button.
Do not restart it by using the option mentioned in that window!
Now go into supersu app. A popup will open to disable the Knox. click on OK. It will take some time to disable it. If its taking more than 5 min and failed to disable, then restart the mobile again and do the same step. it will work now.
Note: You can ignore the last step, If you want to use KNOX – do not disable it.
How to Disable the notification permissions On Samsung Galaxy S7?
Slightly move the notification to the right. You can see a ‘settings icon’. Click on that and you’ll be taken to notification permissions.
If you see “Allo notifications”, disable it.
or
Go to Settings > Applications > Click on 3 dot menu on the right corner and select “Show system Apps”. Find “SecurityLogAgent” and open it.
If you dont see that option to disable the notifications:
Go to settings > device maintainance > Device Security > Click on scan device once and close the settings.
Open the supersu app and you may see the popup to disable KNOX. click on OK. (If you’ve already done this, just restart your mobile)
Restart the device. Done.
If you the see the notification again, install titanium Backup app and Disable/Freeze – SecurityLogAgent & SharedDeviceKeyguard.
Restart your mobile.
I’ve Mentioned that some of the things may not work. But, You can make it work if you follow some of the other threads posted for our S7.
Here is the list of all the different threads about Root:
1. If you dont need anything except root : Follow the above root process and you are done.
OTA Updates & Knox based Samsung Apps (S Pay, S Health, Secure Folder & S Pass) do not work.